In Tower Blitz, you begin with a single tower type, but as you progress, you unlock a variety of towers, each with unique strengths and weaknesses. To optimize your strategy, here’s a detailed tier list ranking all towers in Tower Blitz.
Table of contents
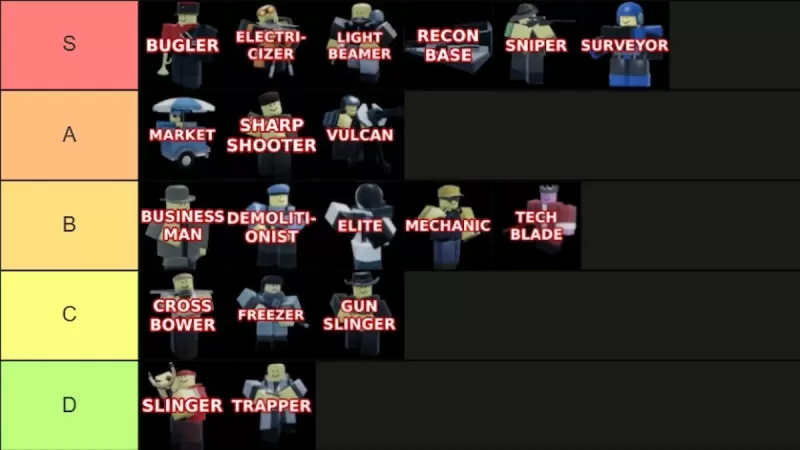
All Towers In Tower Blitz RankedS-Tier TowersA-Tier TowersB-Tier TowersC-Tier TowersD-Tier Towers
All Towers In Tower Blitz Ranked
Image by The Escapist.
We’ve categorized all in-game towers from S-Tier to D-Tier based on their abilities, upgrade paths, cost, and overall effectiveness. S-Tier towers are top-tier, nearly guaranteeing victory on any map with proper use. A-Tier towers are solid but have minor flaws that keep them from the top rank. B-Tier towers are average, offering balanced performance. C-Tier towers are weaker, with limited advantages for specific strategies. D-Tier towers are the least effective, offering little value. Read on for our detailed ranking explanations.
S-Tier Towers
Tower
Cost
Explanation
Pros and Cons
To unlock the tower: 2500 Tokens (available at Level 25)
To place in-game: 750 Cash
Exceptionally powerful. As a pure support tower, it’s nearly essential for Expert mode. It performs brilliantly in any setup, especially when paired with complementary towers. Note that Bugler cannot enhance Recon Bases.
+ Significantly boosts other towers’ performance + Essential for Expert mode – Limited to support role
To unlock the tower: 5500 Tokens
To place in-game: 3800 Cash
Perfect for players seeking a high-impact alternative to Sniper. With unmatched range and damage, Electricizer dominates when placed at the map’s end, obliterating approaching enemies.
+ Immense power and range + Balances support and damage roles – High cost
To unlock the tower: Complete the contract
To place in-game: 1800 Cash
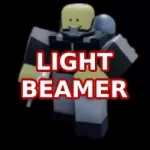
A powerhouse like Electricizer, Lightbeamer excels when positioned along straight paths. Its devastating beam can eliminate nearly any enemy, and both upgrade paths are highly effective, making it a game-changer with proper placement.
+ Extremely powerful + Excellent for crowd control – Less effective early-game – Costly
To unlock the tower: 8000 Tokens (available at Level 45)
To place in-game: 1000 Cash
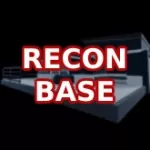
Offers incredible value by spawning operatives that fight alongside you, growing stronger with upgrades. The top path is preferred, but the bottom path is also strong. Despite high upgrade costs, it’s a key to victory in all but Normal mode.
+ Spawns units continuously + Both paths are highly effective + Ideal for Expert mode – Expensive upgrades
To unlock the tower: 1500 Tokens
To place in-game: 500 Cash
The best early-game tower, with lasting value into mid and late-game, especially in Expert mode. Its slower speed can be mitigated by choosing the bottom path, making it versatile and essential.
+ Top early-game choice + Useful throughout the game + High piercing damage – Slightly slow
To unlock the tower: Complete the contract
To place in-game: 700 Cash
A highly versatile tower. Choose the top path for support or the bottom path for offense. Its flexibility ensures it remains valuable from start to finish, adapting to your strategy.
+ Highly adaptable + Effective throughout the game – Limited to four placements
A-Tier Towers
Tower
Cost
Explanation
Pros and Cons
To unlock the tower: 1000 Tokens
To place in-game: 650 Cash
A strong tower when used correctly. The top path is recommended for its focus on generating income, though the bottom path can lead to losses if mismanaged. It’s a valuable asset, especially in multiplayer.
+ Critical for all games, especially multiplayer + Generates profit – Weak bottom path – Slow initial income
To unlock the tower: 1300 Tokens
To place in-game: 600 Cash
An excellent early-game tower for clearing enemy groups. Its wide range covers early needs, though its piercing damage is modest. Place it unobstructed for a smooth transition to mid-game.
+ Strong crowd control and damage + Beginner-friendly – Ineffective in Expert mode – Low piercing damage
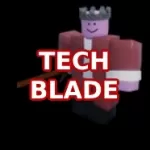
To unlock the tower: 3000 Tokens
To place in-game: 2500 Cash
A solid mid-to-late-game option. Choose between multi-target attacks or increased power. The bottom path’s max level delivers 140 DPS and full defense pierce, though it takes time to reach its full potential.
+ Highly powerful + Versatile – Slow to reach full strength – No flying enemy detection
B-Tier Towers
Tower
Cost
Explanation
Pros and Cons
To unlock the tower: Complete the contract
To place in-game: 800 Cash
A dual-purpose tower that generates income and deals damage. It pairs well with Recon Base but is outclassed by Market for profit and stronger towers for damage.
+ Combines income and damage + Decent for early game – Easily outshined by alternatives
To unlock the tower: 3500 Tokens
To place in-game: 900 Cash
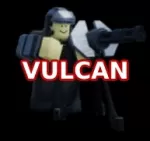
Effective early-game tower for handling groups with high piercing damage. It becomes obsolete as better options emerge and lacks flying enemy detection.
+ Strong crowd control and piercing damage – Loses value after early-game – No flying detection
To unlock the tower: Complete the contract
To place in-game: 1200 Cash
Similar to Vulcan but less versatile. The bottom path is the better choice, though its long cooldown limits its effectiveness.
+ Decent bottom path – Long cooldown – Costly
To unlock the tower: Complete the contract
To place in-game: 480 Cash
Useful in mid-game with its Tesla turrets, but its high cost and limited impact make it less viable outside specific strategies.
+ Effective mid-game – Costly for its impact
To unlock the tower: Free (available at Level 10)
To place in-game: 400 Cash
A melee tower effective for early-game crowd control and tanks. Its short range and slow speed hinder its overall performance.
+ Handles crowds and tanks + Early-game efficiency – Limited range – Slow
C-Tier Towers
Tower
Cost
Explanation
Pros and Cons
To unlock the tower: 200 Tokens
To place in-game: 400 Cash
A decent early-game option for beginners or as a Slinger alternative. Its long range and crowd control are offset by low damage output across upgrades.
+ Affordable early-game tower + Long range – Ineffective after early-game – Low damage
To unlock the tower: 450 Tokens
To place in-game: 400 Cash
Useful with high-DPS towers for slowing fast enemies. However, it becomes obsolete once enemies gain freeze immunity, making other tower combinations more effective.
+ Effective against fast enemies – Obsolete after early-game – Limited enemy compatibility
To unlock the tower: 500 Tokens
To place in-game: 400 Cash
A melee tower with insufficient speed and range. The top path improves range but sacrifices already low damage, making it viable only in Normal mode.
+ Decent top path – Short range – Ineffective in Hard or Expert modes
D-Tier Towers
Tower
Cost
Explanation
Pros and Cons
To unlock the tower: Free
To place in-game: 200 Cash
Slinger is designed for beginners, serving as an introductory tower. Its poor damage and speed make it useful only in the first wave before being replaced.
+ Free – Poor damage and speed, even at max level – Useless after initial waves
To unlock the tower: 1000 Tokens (available at Level 10)
To place in-game: 500 Cash
Despite its cost and level requirement, Trapper struggles against even weak enemies. Stronger, cheaper alternatives make it an inefficient choice.
+ Decent bottom path – Poor cost efficiency – Nearly unusable – Struggles throughout the game
With our comprehensive tower tier list, you’re equipped to craft the perfect strategy for your play style. For a boost in Tower Blitz, check out our codes to get started.
October Prime Day may be winding down, but eBay is rolling out some of the most incredible OLED TV deals I've seen, thanks to Electronic Express. Right now, you can get every size of the LG Evo C5 4K OLED Smart TV at the lowest prices of the year by
Last updated May 02, 2025 - New Hunter codes have been added!Searching for Hunter codes to get more crystals? IGN is here to help. We've compiled a list of all currently active and working codes that you can use for free to boost your crystal supply.
The BBC has unveiled plans for a Doctor Who animated spin-off coming to children's channel CBeebies, arriving during a period of significant transition for the iconic sci-fi series.A Mysterious New Adventure BeginsDetails remain intentionally vague a
Thomas Waterzooi is crafting another unconventional art-based puzzle game. This time, he’s asking players not to interact, but to simply observe the artwork. The new title, Please, Watch The Artwork, is heading to mobile soon. It debuted at the Day o


 LATEST ARTICLES